Logitech Brio 4K webcam rework instructions
Recently Logitech released it’s newest camera BRIO 4K (8.8 Megapixels, wide dynamic range, great white balance, up to 90fps, USB3.0). Just like previous models it has fixed angle lens, which in some cases it is not enough. This is where custom housing for exchangeable C and CS-mount lenses comes in handy. And there are vast variety of these lenses: fisheye with Field of View (FOV) of 180° and more, telephoto with great magnification, fixed zoom, adjustable zoom, motorized, macro, telecentric and many more. Also you will gain ability to attach it to other optical and scientific instruments like microscopes or telescopes.
Previous attempt to make kits for C920/C922/C930e webcams was highly successful and now reworked cameras are being used in variety of applications like conferencing, self driving cars, insect motion analysis, traffic/free parking space analysis and many more. I don’t have plans to stop making them so there will be a choice between cheaper and high performance cameras.
Logitech Brio was released to offer 4K resolution, more vibrant colors and frame rates up to 90fps. And with replaceable lenses you can achieve amazing results. Even universal zoom lens will provide stunning results! And the best thing is these kits are already available on e-store!
Disassemble camera and salvage necessary parts
Reworking camera is simpler than C920 (less screws, simpler construction). Just some basic electronics skills are required to unsolder few parts. Detailed rework steps are described below.
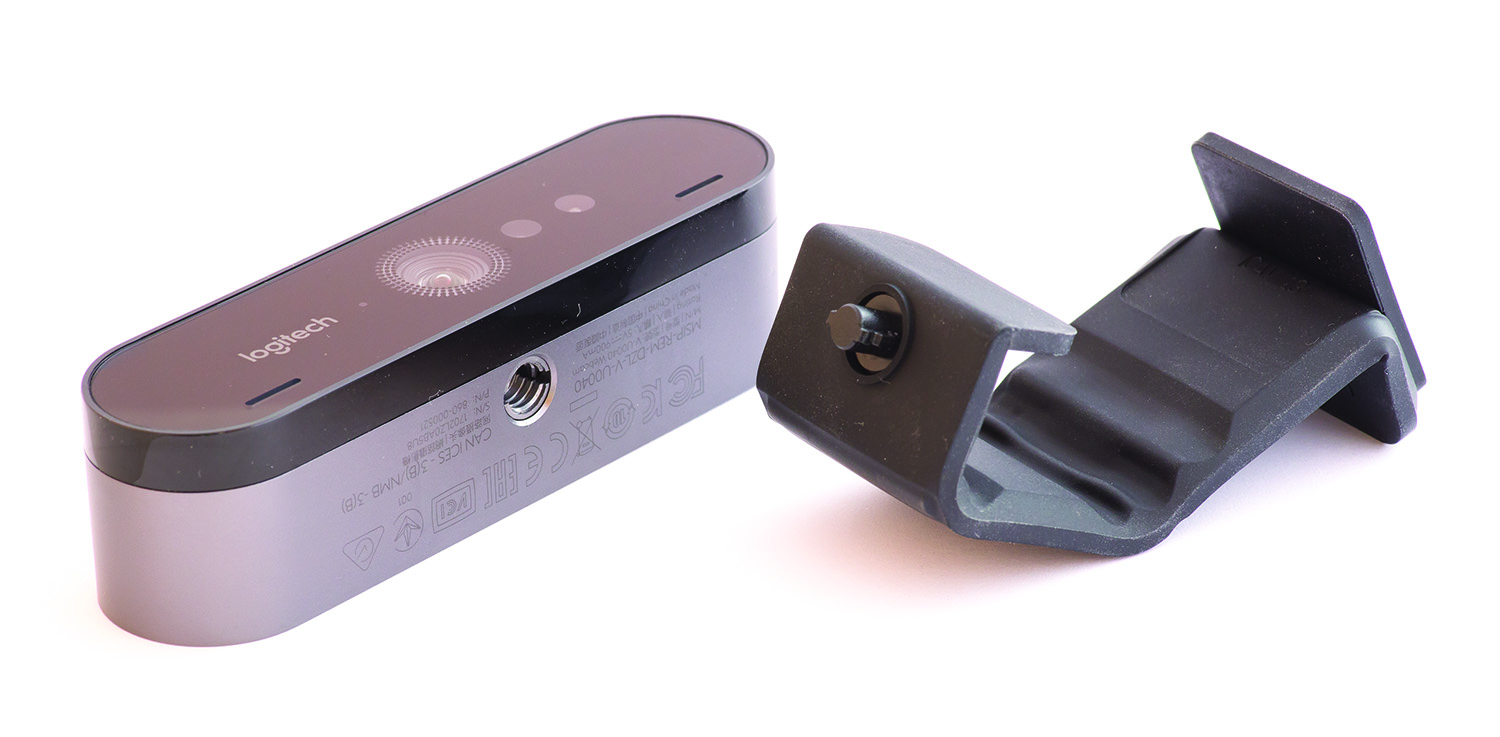
Remove articulating mount. Just pull it ant mount will separate.
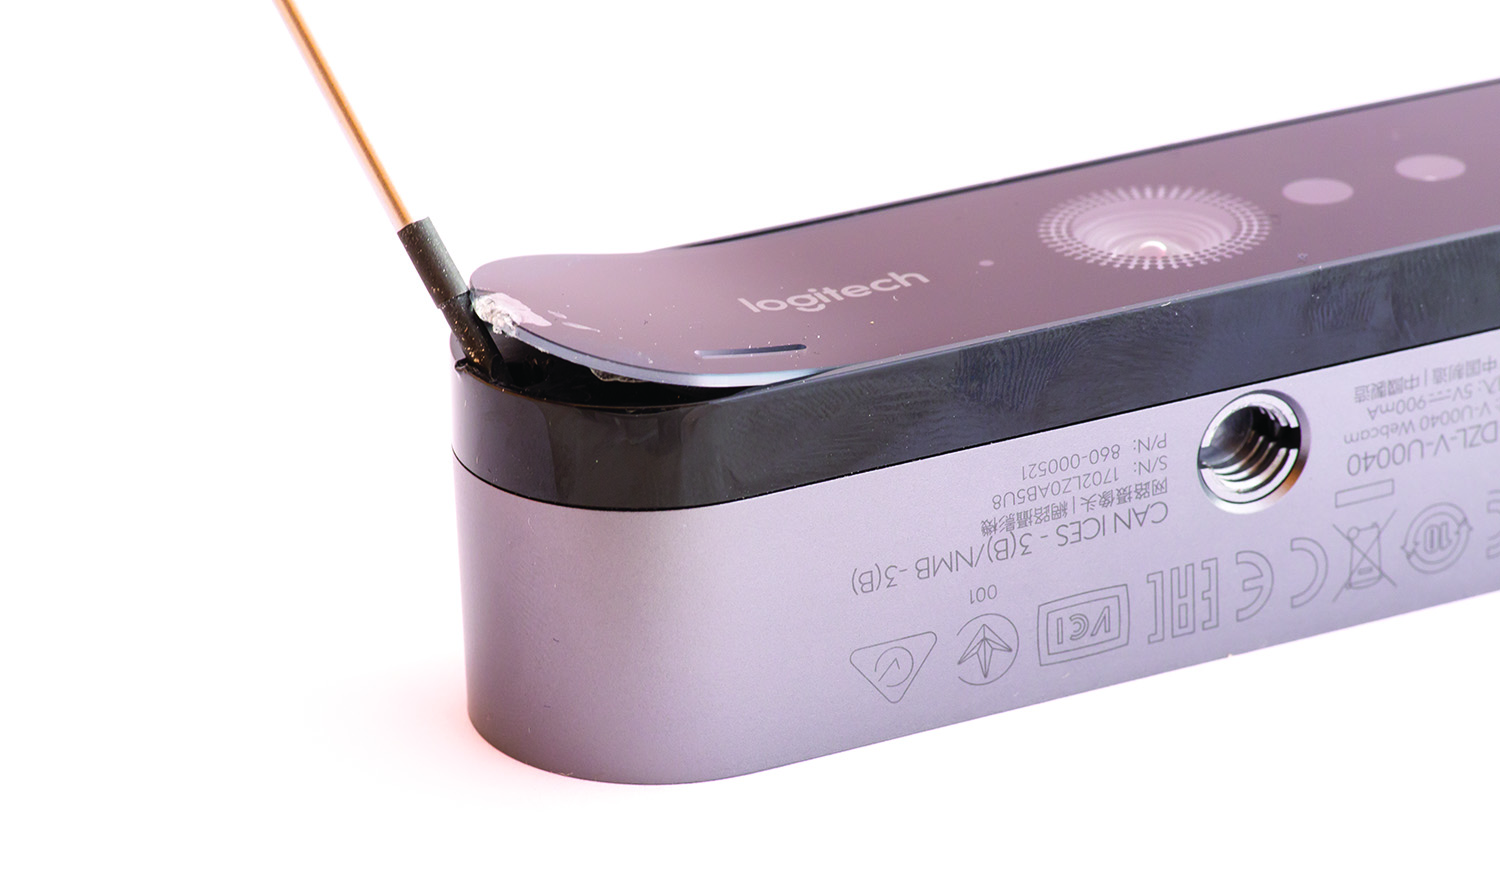
Remove glued plastic front plate. Use small screwdriver, tweezers or other sharp object to pry inside and peel it off.
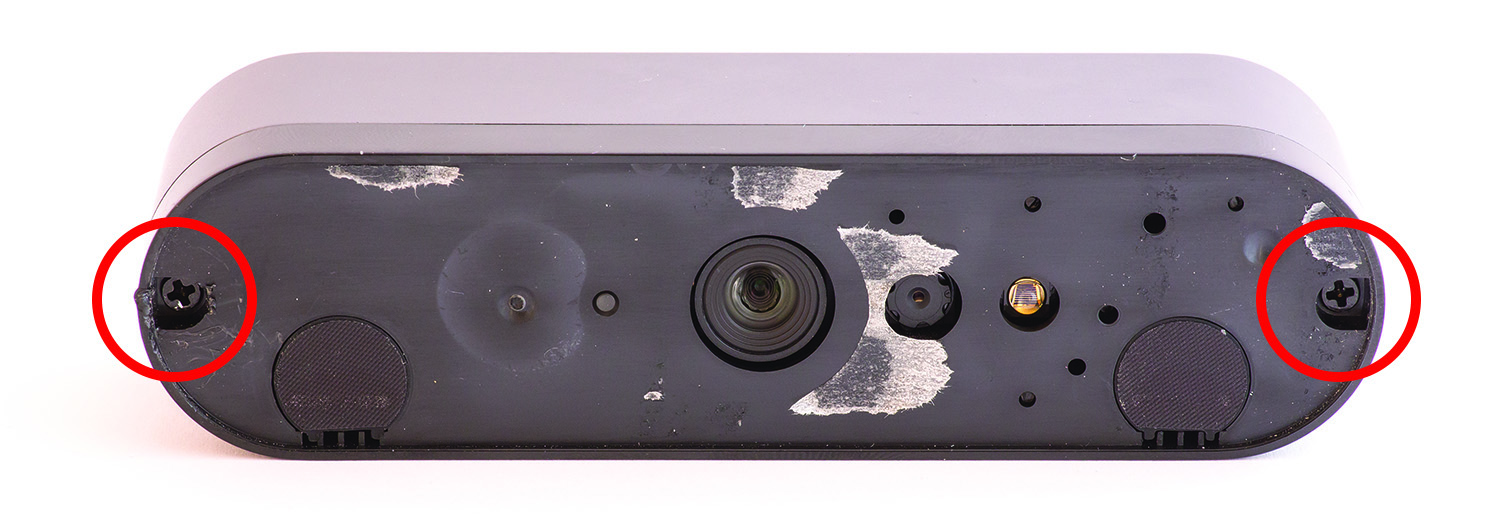
Plastic assembly is held by two Philips screws. Unscrew them.
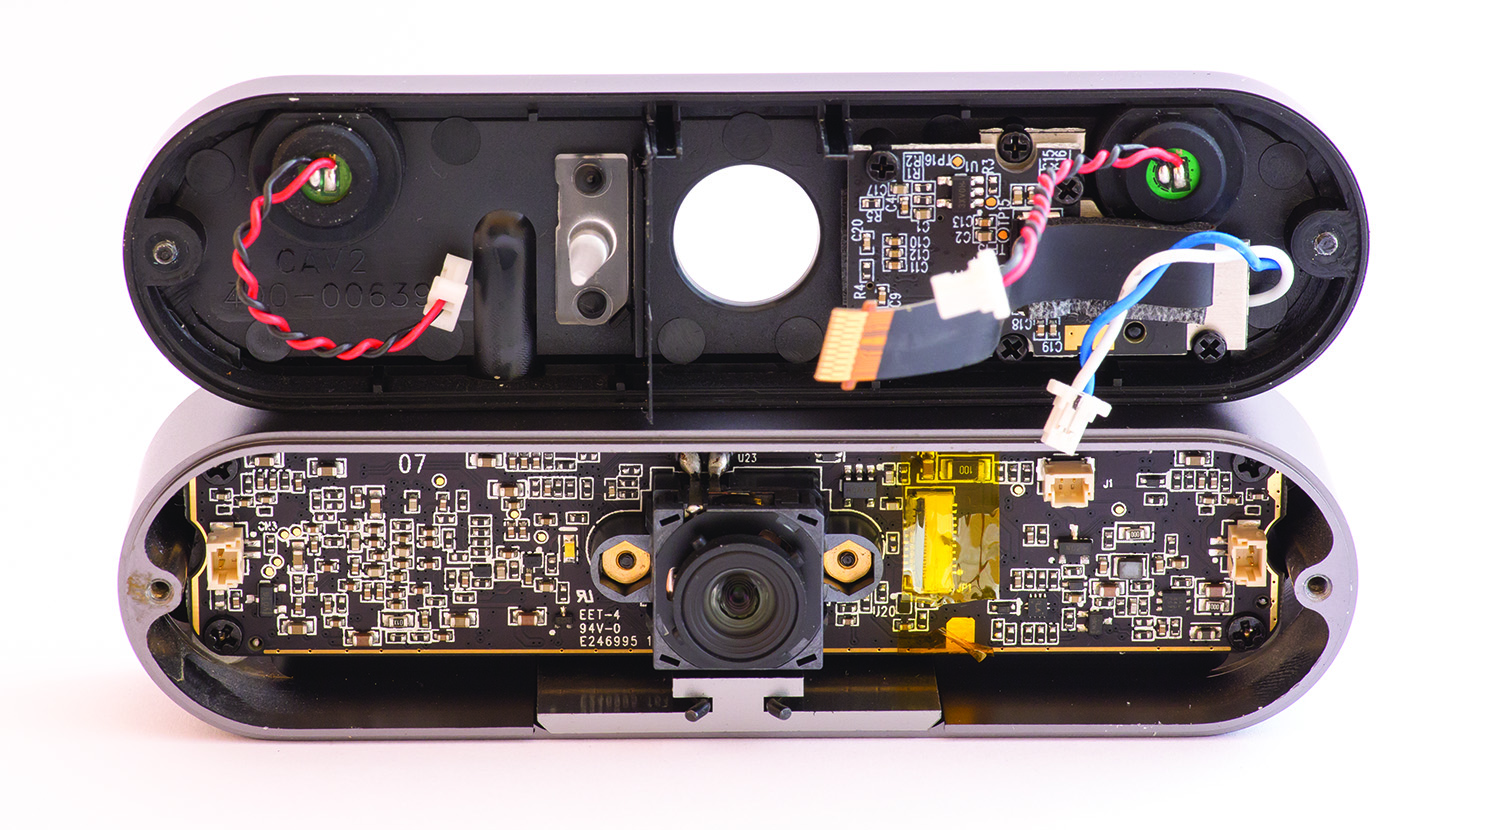
Disconnect cables (microphones, LED, Flat Flex Cable for IR camera). If you plan to use remove microphones and put them aside. Can be removed by gently pulling them out.
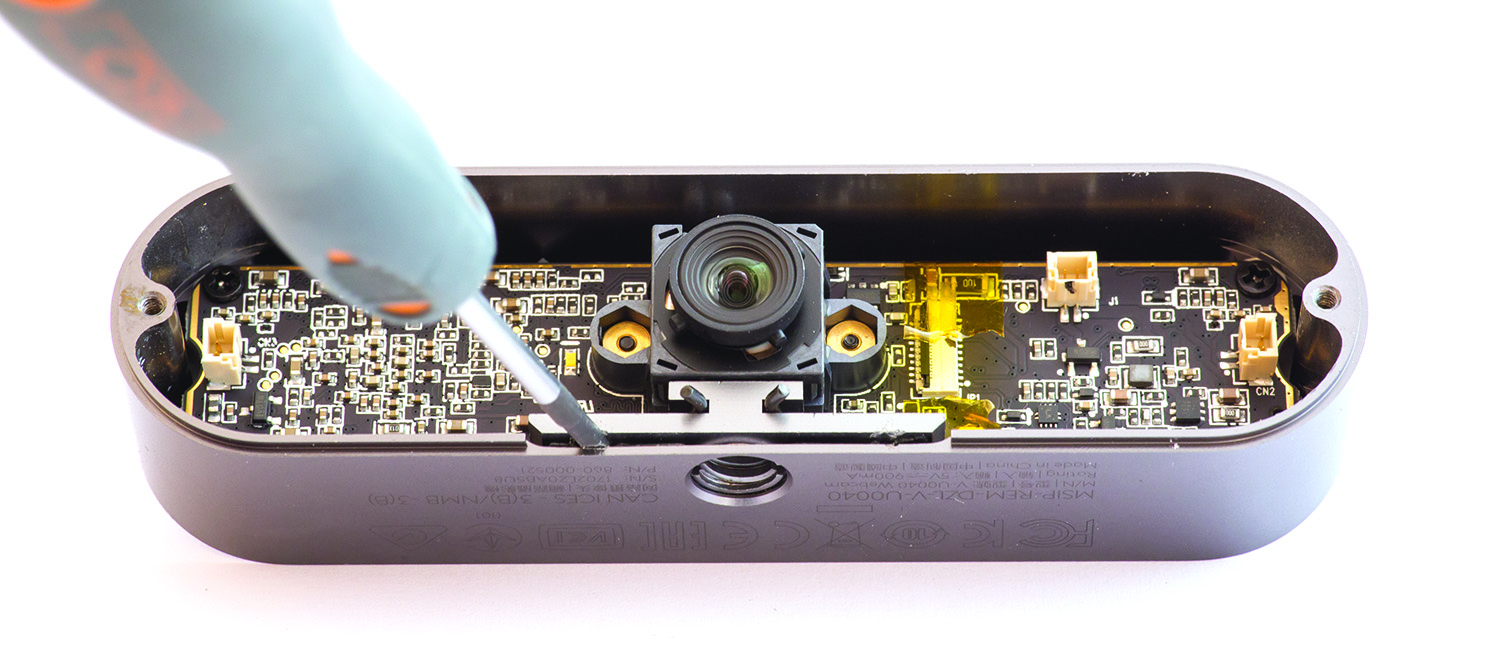
 Mount plate is attached to enclosure with double sided adhesive tape. Pry small screwdriver or other flat sharp tool to separate them. Wiggle to remove and be gentle not to damage PCB.
Camera PCB is held by four Philips screws. Undo them to separate board from enclosure.
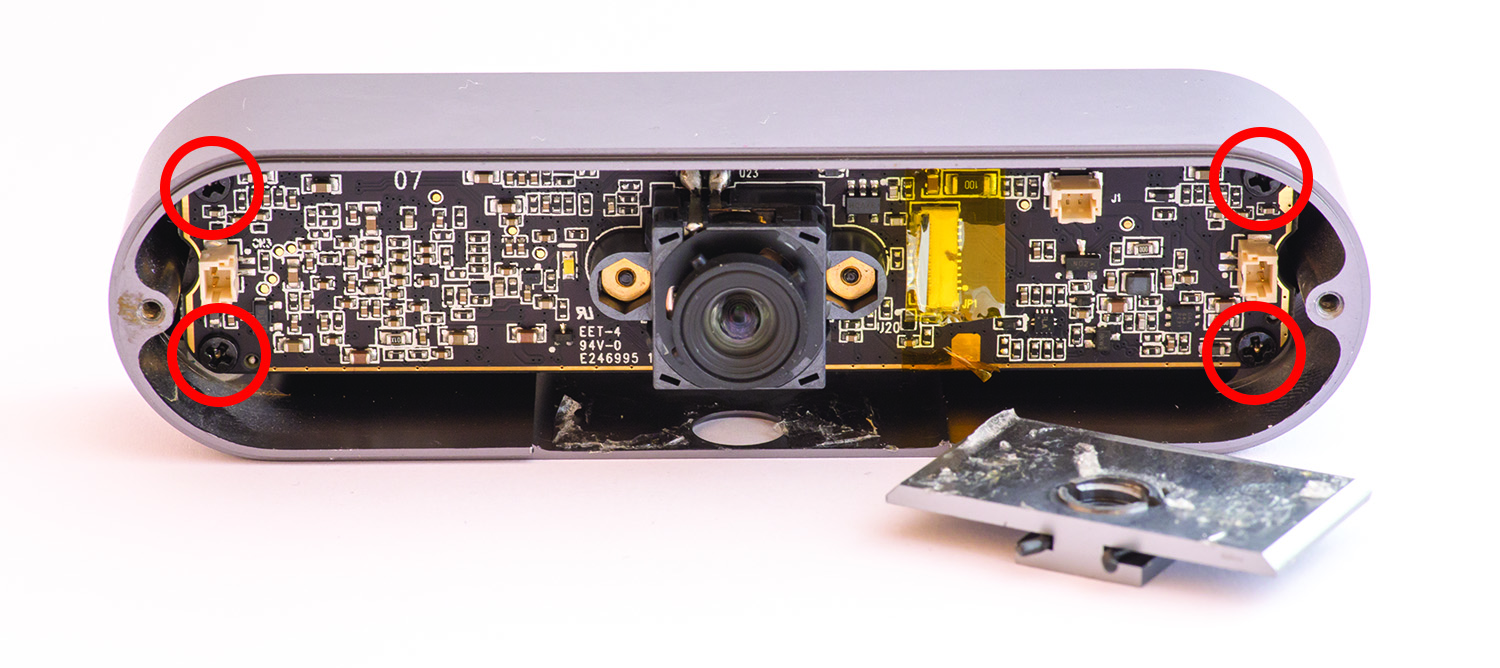 Modify camera assembly
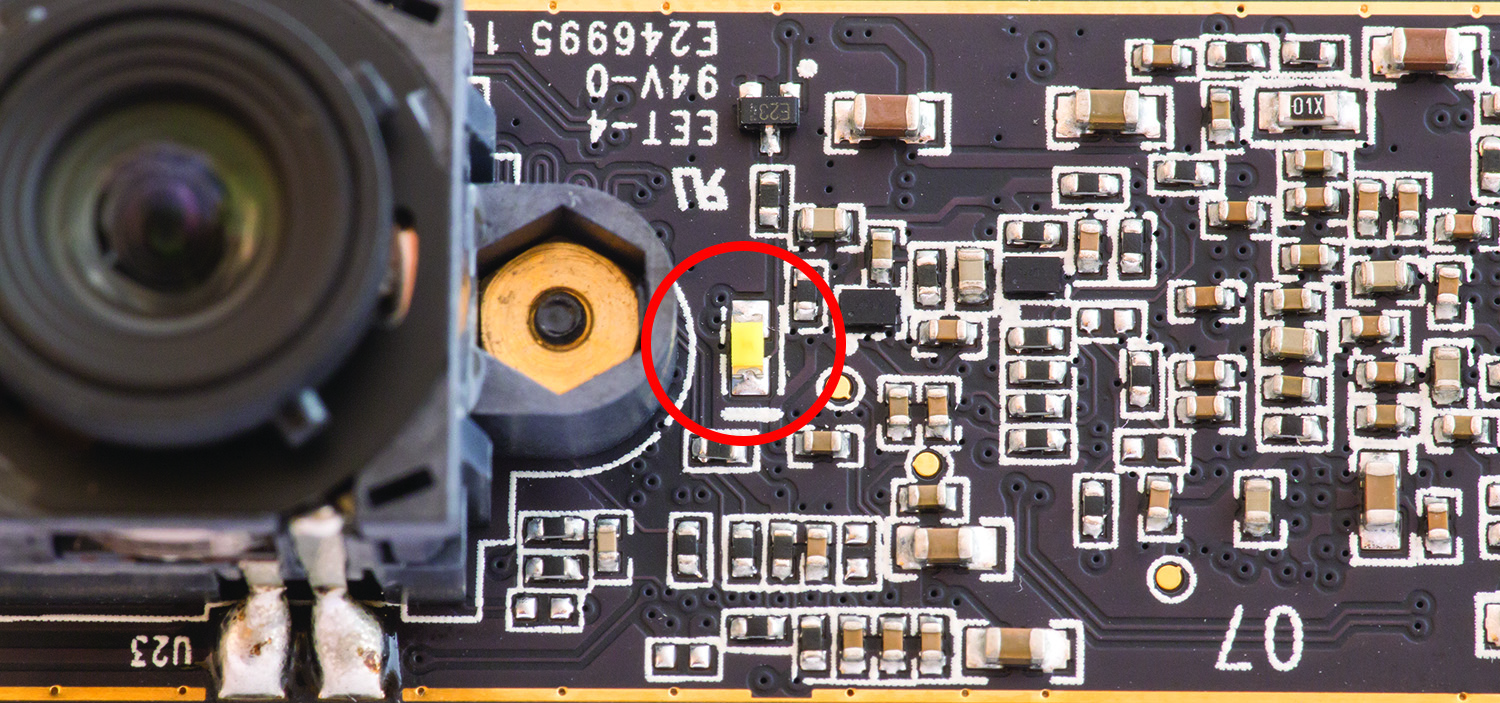
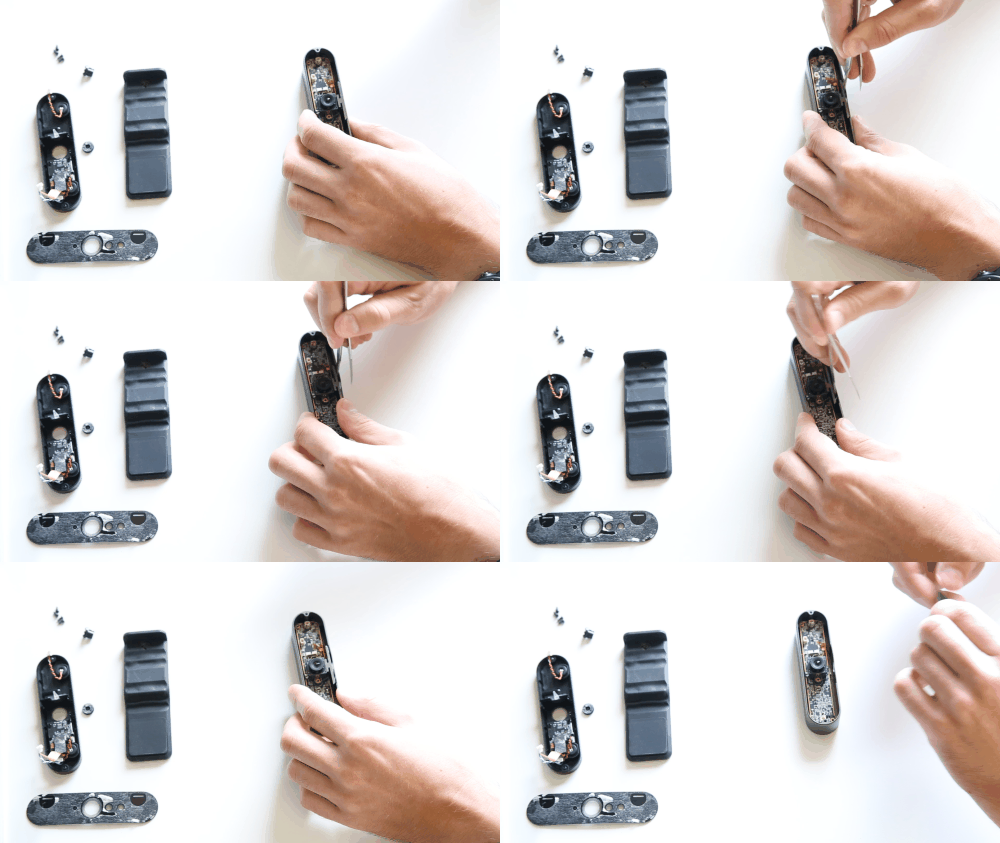
Camera has nasty white LED facing lens direction. If you don’t remove it LED will shine inside enclosure directly into sensor. Unsolder it.
Lens focusing coil is soldered to PCB. These pins also must be unsoldered.
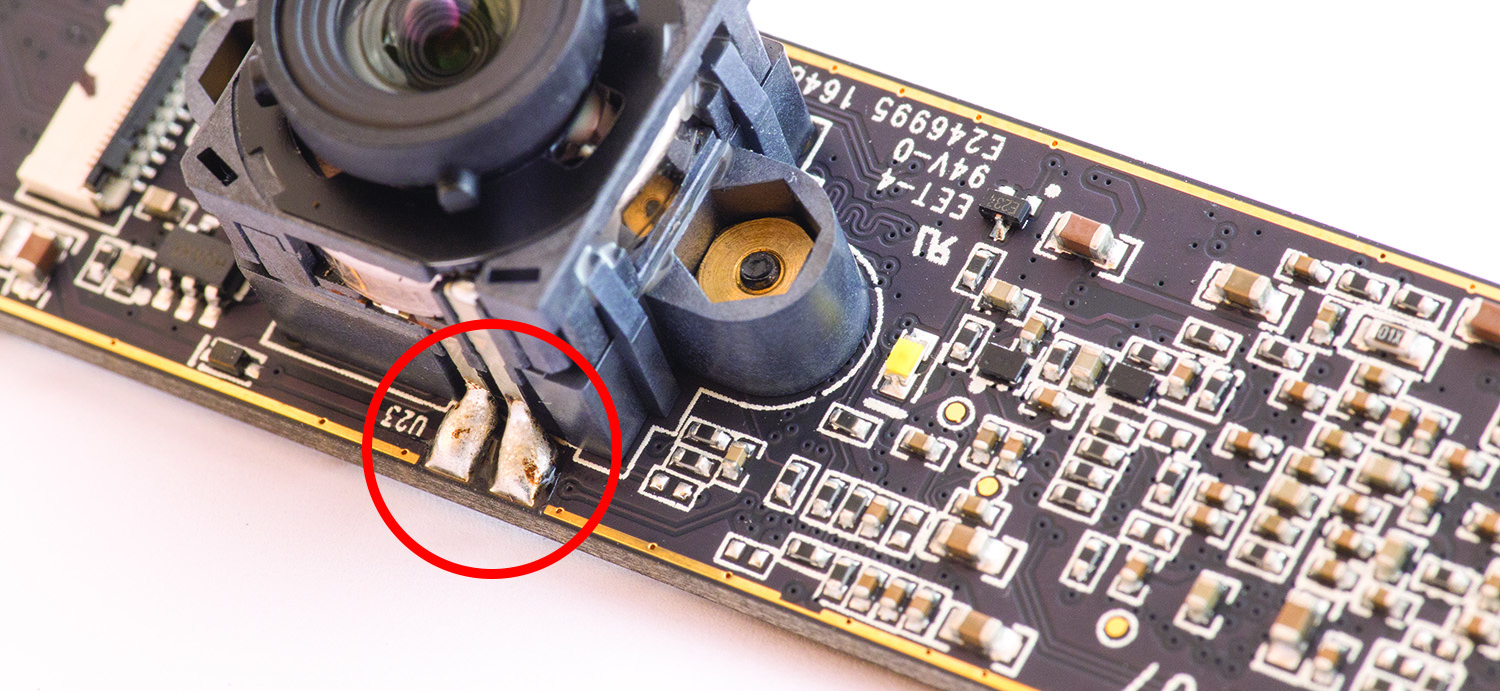
After detaching these components PCB should look like this. It is the only soldering operation required.
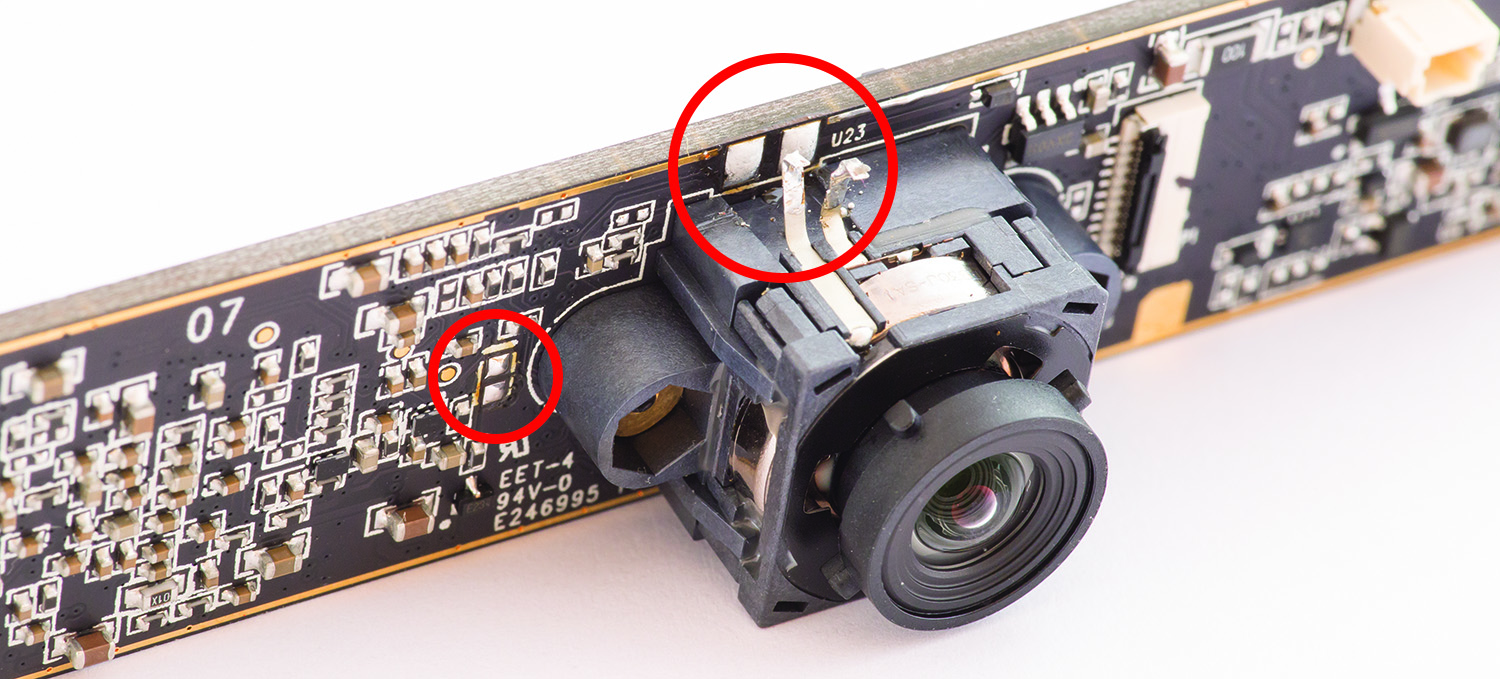 Lens assembly is held together by two screws. This is last teardown operation. Be careful not to leave your fingerprints on the sensor. If you don’t feel comfortable with bare sensor exposed to your workbench, leave it attached for now and remove right before screwing camera PCB into new enclosure.
Tools and kit content
Kit includes all necessary fasteners and hex keys to put your new camera together.

- Hex keys
- M2x20x83
- M1.5x17x75
- Screws
- DIN912 M1.6×4 – 6 pcs (camera PCB)
- DIN912 M2x3 – 2 pcs (microphones)
- DIN912 M2.5×6 – 4 pcs (enclosure)
- DIN912 M2.5×10 – 2 pcs (enclosure)
But some other tools are required:
- Knife, tweezers or small flat screwdriver to separate parts attached with double sided adhesive tape
- Small Philips screwdriver to disassemble new camera
- Soldering iron to remove surface mount LED and lens assembly pins
Assemble new camera
Insert microphones into designated cutouts and secure them with screws. Remove lens assembly and connect cables to camera board.
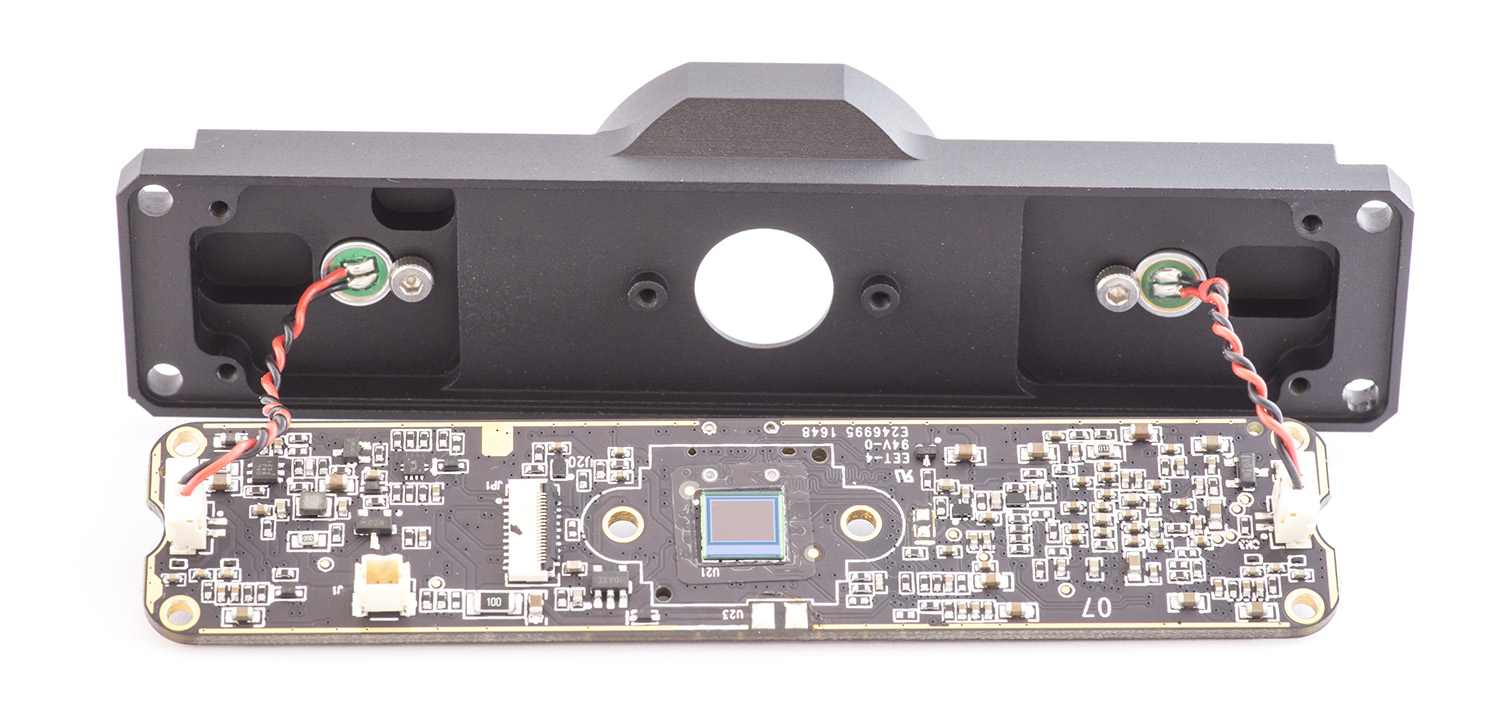 Use included hex key to screw six DIN912 screws. Make sure microphone cables are not pressing against camera board or components. Use tweezers to manipulate them.
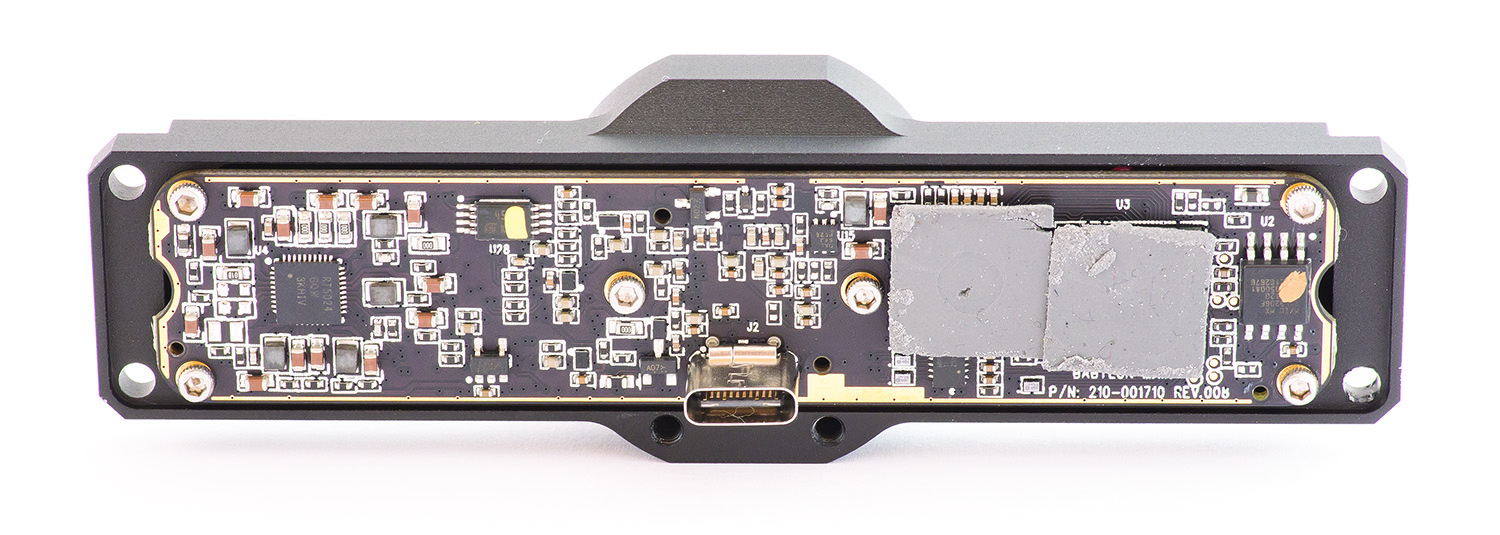 Now fasten remaining fasteners and you will have complete camera.
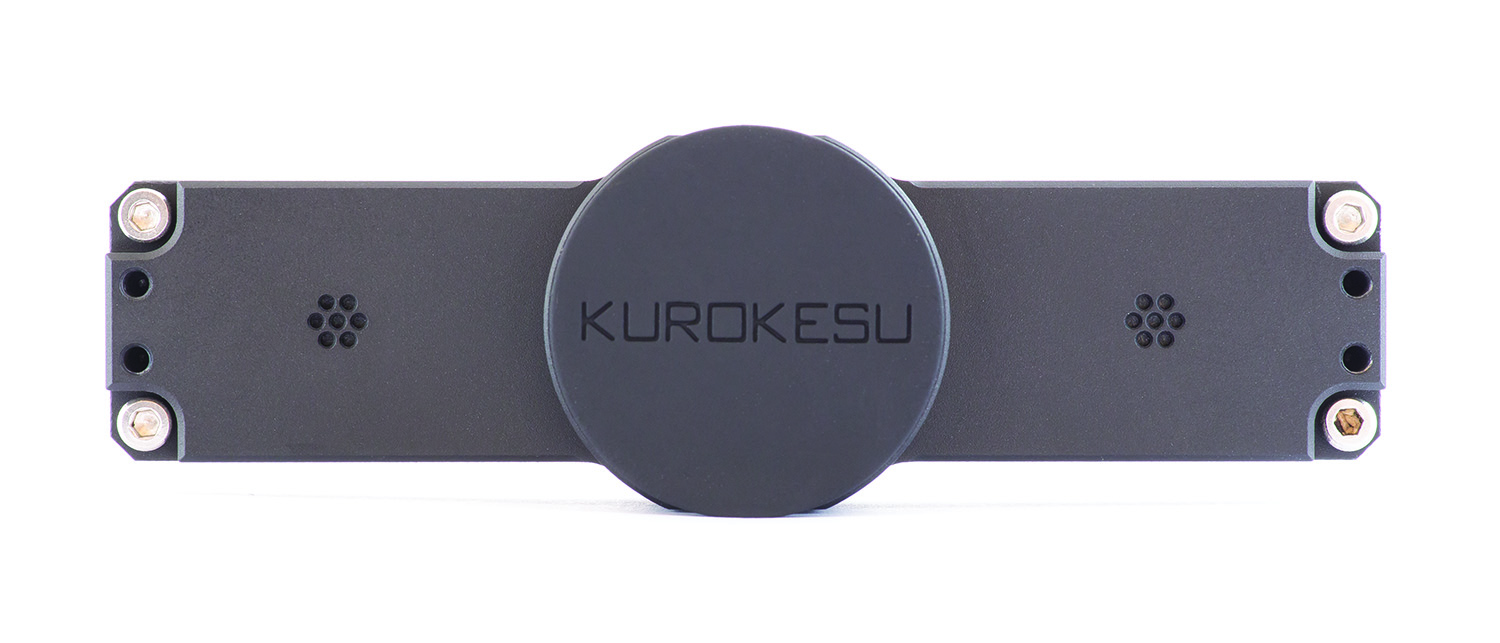
Final notes
Dust
Dust is common thing and by exposing camera to uncontrolled environment expect some can settle on the sensor. If not during rework, dust can appear after some usage. Usually local photo equipment retailers have kits and tools to clean camera sensors.
Light filter
After completing rework, camera will be sensitive to full spectrum. Depending on your application feel free to leave it as is or use IR LOW PASS filter for normal operation or IR HIGH pass filter to see infrared part of available light. Filter can be mounted with few strips of double sided tape.
Lenses
Camera has high resolution, with crappy lens you will get crappy result. Feel free to use tested lenses that can be recommended. Even with cheapest one you will be able to achieve results like tested earlier

Comments ( 68 )